Tuesday, January 31, 2012

Studio Progress/ hours


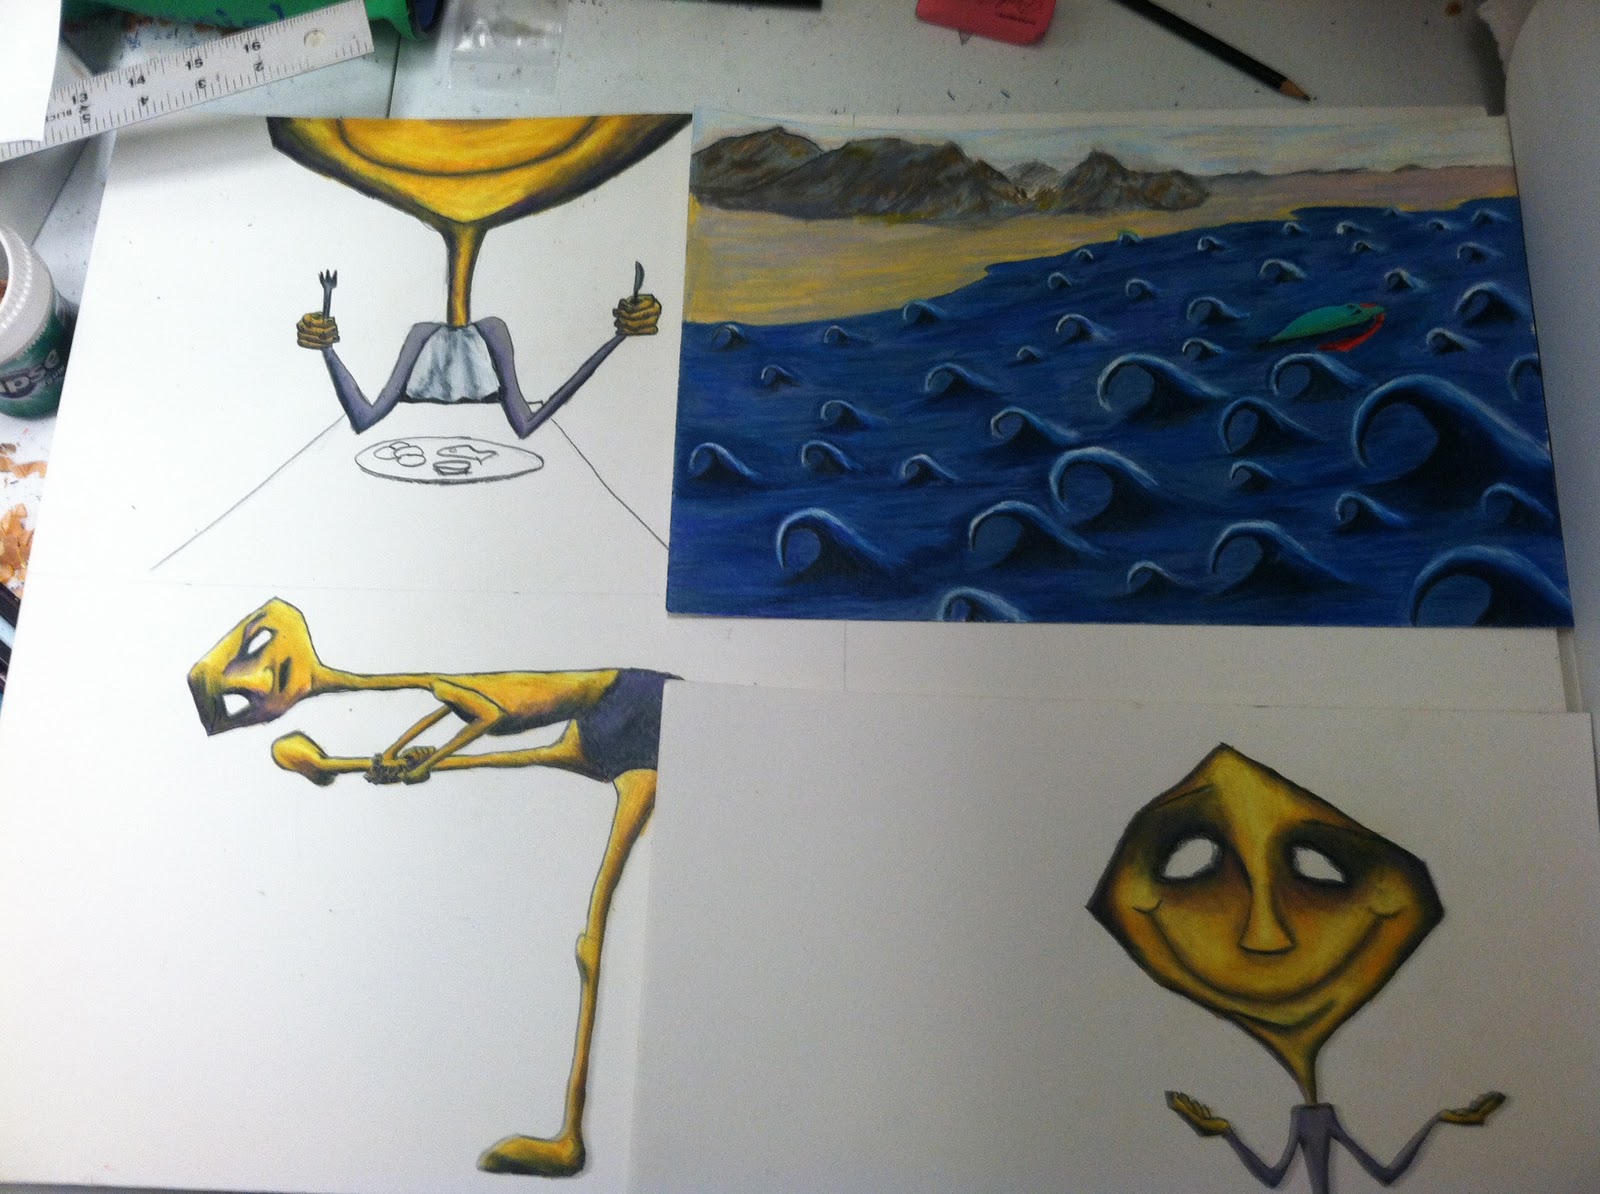
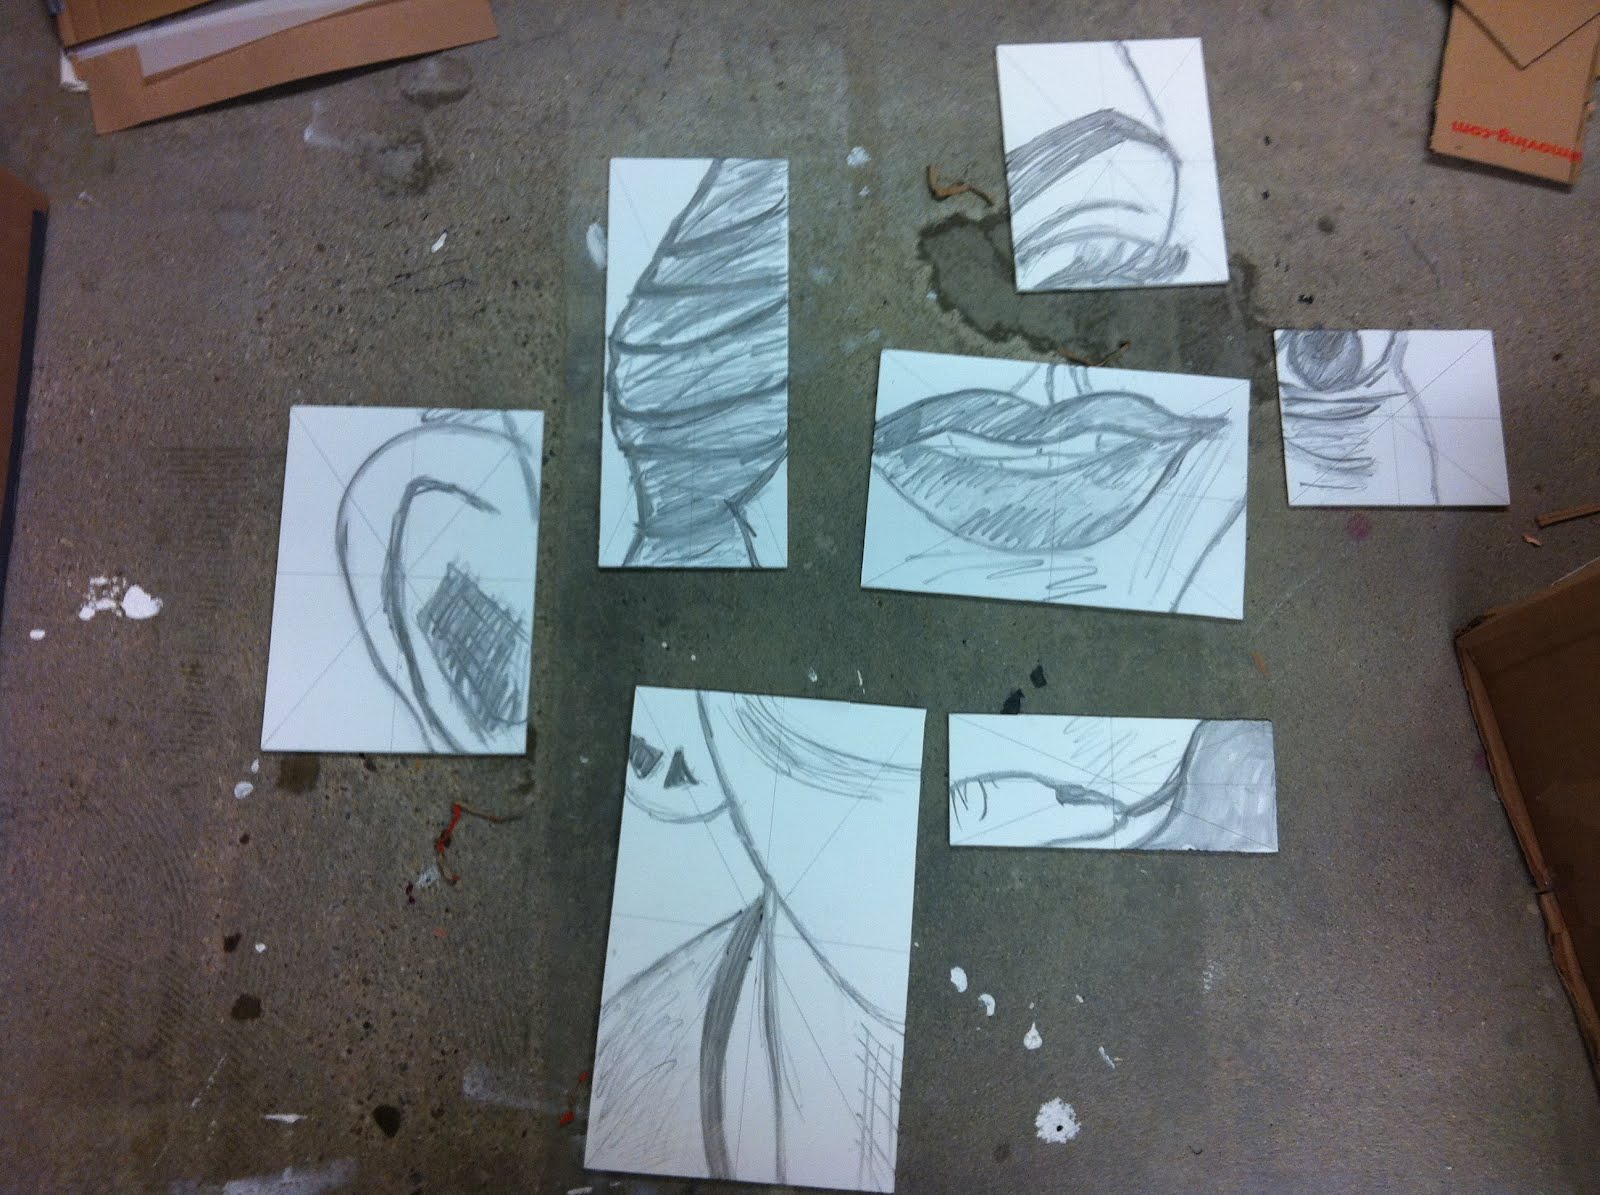
I have been working mostly on the second Large storm drawing of the series ( the calmer one ) this past week. Now I am finishing it up while adding details once in a while to my first one, without pushing it too far. I plan on starting the third drawing sometime this week. I think it will be even more intense than the first.

Hours:
Mon-2
Tues-5
Wed-2
Thur-4
Fri-1

Monday, January 30, 2012

Progress Update

Clothes for concertina:
The wig for concertina has finally arrived


The skirt is completely patterned and the panels are partially cut out, I need to go buy more of the purple fabric and an "invisible zipper".


The shawl is nearly completely constructed as well, here it is in progress at my sewing machine


Hours
Monday 4 hours
Tuesday 3 hours
Wednesday 6 hours
Friday 5 hours
Sunday 6 hours

progress

Here are the 4 new images for the story. they are taking longer than I had expected So I am a little behind schedule but I should be able to fix that this week with extra work.

monday- 4 hours
tuesday-6
thurday- 6
friday-2


Progress

This past week has been a lot of prep. Dimensions for hard wood order. glueing mdf together to route out the mold on thursday. making sure the file for the CNC machine is spot on.

Menu design is still in the making. Lots of research out eating and cooking (keeping notes in a journal with the help of my ethnography class teaching me about field notes and observation)

Monday - 3 hrs
Tuesday 6 hrs
Wednesday - 2 hours
Thursday 6 hours
Saturday 4 hrs

Progress 1/29/12


Currently I've been furiously carving away at my pigeon block. I technically am 2 days behind but as long as it is finished by tonight or tomorrow morning I don't see it as a major setback. By next week I need to buy the rolls of Mulberry so that I have sheets large enough to print on. Tuesday I am putting together my plywood order for my raccoon print.
As far as calculated hours I have spent about 1 hour on layout and over 10 on carving.

Studio Progress 1/30

Progress this week didn't exactly go the way I had planned. Re-dying my fabric ultimately did not help in getting the color I wanted, so I'm going to have to start over with new fabric or switch it out for one that I purchased from Joann's.

Because of this, I couldn't start sewing the squares for the second quilt yet. So in the meantime, I've gone back to working on quilt #1. I scaled down my design and made a smaller pattern so that I could create 1/4-size squares (four of these will be equal in size to one of my original existing squares). I've been cutting out and sewing these all week, and when I have a bunch more I'm going to integrate them into my existing first quilt. Below is a picture of a new square (left) next to an existing one. I think once I integrate this scale change into the entire quilt it will help add more interest to the pattern.


Hours:
Monday 8:30 - 11:30 (3)
Tuesday 10:30 - 12:30, 1:30 - 4:30 (5)
Thursday 10:00 -12:30, 1:30 - 4:30 (3.5)
Sunday 3:00 - 6:00 (3)

Total: 14.5

Progress

I have been going back and forth about materials and embellishments for my next inflatable. However, the overall design still remains.

I received the nylon rip stop that I had ordered and sampled using the surger on the material. I plan to use this material with the surger for the middle tube that connects both ends. Also, I purchased other materials that I might use for both ends instead of the clear plastic.

I also made a mini model to see if the material would inflate. This is the front of the model. I cut out the chiffon material because I would like to create a laser cut snow flake design with the chiffon and the anti-static polyester behind it.

This is the side of the model. I would like to also create laser cut snowflake design that pleat along the sides. I really like how if you fold the chiffon over itself it creates a darker color.
This is the snowflake pleated design I created in illustrator. I have set aside a time on tuesday to use the laser cutter and see what the design looks like when it is actually cut into the fabric

Next Week:
-Test laser cut design
-make a few more models testing materials
-start the body of the final inflatable with nylon rip stop and surging technique
-finalize end designs

Logged Hours:
Monday January 23rd: Test other plastic materials and concepts (9am- 12pm and 7pm-10pm) 6 hours

Tuesday January 24th: Laser cutter demo, analyzing designs, look at different motors and fans since I have yet to purchase any, and think of other ways besides inflatables to add to installation ( 10am - 1:30pm, 2:30pm - 6pm, and 7-11pm) 12 hours

Thursday January 26th: Look at different laser cut design ideas and create designs in illustator (9 am -12:30 pm) 3.5 hours

Sunday January 29th: Purchase other fabric and create model (5 pm- 9pm) 4 hours

Total: 25.5

1/29 update


This past week has consisted of alot of research and frustration towards my IP project. I managed to finish my console and am continuing to work on my Rhino skills.
Monday: 3 hours. Redefining my thesis.
Tuesday: 7 hours. Design Research on sine and cosine curves. Looking at the human body for the ideal chair. Thinking/sketching out possible mold ideas
Thursday: 7 hours. Rhino Files/studies.
Friday: 4 hours. Spoke with Kyle, Mike, and Mark about current artists working with compound curved furniture.
Sunday: 9 hours. Oil and photograph finished console.
30 hours. Dont have too much to show :/

progress


This week has been spent putting together the questions from the interview. The first half went really fast but the second half became harder and harder to put together. Might have been because I have been listening and watching the same thing in a circle, over and over again. I was able to find my own footage of the other artists Yos spoke of, so I was able to overlay them along with pictures of the famous parties that he DJed at. There are a few mistakes I have to touch up and tomorrow I believe I can do a full render and have a ready interview to show on Tuesday for class.

I also met with Prof. Ellis and we discussed a few options that I looked into for designing my site - certain content management systems that would make the site versatile and updatable. I was debating wordpress but he also mentioned to me text pattern, another CMS. He also recommended to me another way to handle my events listing - instead of arranging them by popularity, simply call on an API to show how many people are attending the event. This information would be drawn from Facebook.

He also suggested I think about whether I should employ user comments to make my website a social platform as well. I am still on the verge with that.

Video Editing: 9 hours
CMS research: 1 hour
Image Pooling: 1 hour

Sunday, January 29, 2012

January 29th update- Teresa

Working more on the environments. Fleshed out the house in Illustrator and placed it into a 3d environment in after effects.

Weeds

Still of the meteor

Ze moon!!

I also managed to attend a 3d modeling lecture on Friday in Chicago. Learned a lot, and past my artists block for my characters.


Wednesday- 2 hours
Thursday- 8 hours
Friday- 7 hours
Sunday- 3 hours

1-29-12 Arambula

This week has been rather frustrating concerning metal. I have been at the steel store ordering steal rods to make the infer structure to be done this week as upon getting the metal the cuts were the wrong size so more metal has to be ordered. Main frame set to be done this week. Working on break down and set up of structure to make portable. Place found for full construction pulley system being set up in sculpture studio. Welding of metal (5hrs) took longer than needed. Also photos for images to be flashed were taken of PTSD (6hrs). to be put into video format this week.
outside stud:11
in stud: 12


update: mock installation complete

I have completed my mock installation! I thank Meijer for the (not so cheap) rotating clip hangers. The hangers allowed me to reposition my segments vertically and horizontally easily.

Here are some pics!


Tuesday: Studio/Class - 3 hrs
Wednesday: Revising Off-site proposal - 3 hrs
Thursday: - Studio/class all day. Working with off-site stuff all day (bajillion hours)
Friday: 4 hours - cutting string sizes and taping to back of segments. Sectioning off "guy's" face (my new subject)
Sunday (today): 2 hours - hanging installation

This week I plan to translate my new subject's face into the vine charcoal installation.
I have to:
- decide where I want which segments to be in the 3-D space
- draw on the glass and work with parallax in model
- record these measurements of segments, and measurements of depth points.
- cut foam to life-size segments
- using triangle gridding system to enlarge smaller drawing onto foam segments
- tape string
- hang installation.
- and then... translate the foam segment drawings to lithography handplates - I need to make sure I remember that there will be a "reflection" effect.


Colors got messed up.  These are rough.  Sound is not final, sound effects not added yet.  Hours: Lots.

Elyse Shapiro Studio Update for Jan 23-29

Studio Progress Update for Week of January 23rd to January 29th

To create a piece to top the lamp, I cut a piece of 1/16th'' polycarbonate measured to a similar size of my lamp. I then spent time sanding down the piece with the powersander in the woodshop. I also experimented with the effects of using sandpaper of different grains and the powersander vs by hand. Ultimately, the powersander with 100 grit sandpaper gave the best effect at dispersing the light within, not distracting from the piece, and concealing the inner workings of the lamp.
This week, I also spent time experimenting and researching the best materials and techniques for light disbursement within my pieces. In my IP review, Sean Jackson made comments on the "hot spot" from the CFL lightbulb within. My attempt above is with a super thick mylar once sanded down and adhered to itself using ZAP-A-GAP. Unfortunately, sanding the material made it brittle and unable to hold when applied, it began to crack. I plan to visit Hollander's monday to search for a potential paper light disbursement tool.
For the final printing, I have decided to mix colors of acryllic paint to sit on top of the very thin material. This will be interesting to see once combined with the vellum inner layer that has just been printed.

The image above is the material testing while printing in the studio. I printed the same photoscreen on two different materials experimenting with number of passes, acrylic paint, textile paint, sheer polyester material, and a thin muslin. Beneath is a previously tested print when I attempted to use dye. It was ultimately not strong enough to eat into the fibers and it was better to have the ink sit on top of the material.

In-studio hours, week 4:

Monday- Begin searching for designing inner layer of lighting fixture for lighting disbursement. Sand and attempt to connect with ZAP-A-GAP glue (5 hours)

Tuesday- Begin sanding down polycarbonate for top layer, test and compare samples. (4 hours)

Wednesday- Print 3 types of row of occupancy on fabric with textile paint and acrylic paint. Compare samples and purchase all poling for remaining lamps. (4 hours)

Thursday- Print the "potentially" final outer layer for lighting fixture 1 and begin experimenting with rubbing alcohol as color dissolver and remover (4 hours)
Friday- Continue working on Elzhi design for lamp 2, create sketches with material requirements and plans for second lamp (5 hours)


Total: 22 hours

Thursday, January 26, 2012

3 Week Update - Monica Ross

So. I was sick the first week, and worked mostly from home. 2 all-nighters. 13 hours each = 26 hours put into the first week.

Last week I came into the studio on Tuesday from 10:30 am - 4:00 pm, then 6:30 pm to 10 pm. Thursday from 9:00 am - 4:30 pm. Equals 16 hours for that week.

This week, I went into the studio from 9 am to 4:30 pm on Tuesday. From 8 pm - 7 am Wednesday (I'll be here until I go to work). Worked a bit at home on some frames. Slow working this week so far just because I trashed a scene that was really weak. 18.5 hours in studio this week so far.

Progress is alright with my project. The scenes are coming out just fine. I wish that I had time to go and do more solidified linework. Also, at this rate, I don't know how scanning/editing/coloring is going to fit into my schedule. As well as writing a script and recording actors...
I'm starting to consider making this more of a trailer than the whole piece? Or making it a silent-no-dialog animation short(er)? I think reality of time and effort is setting in, and I am reluctantly realizing that something has to give if I want this to be a certain level of quality. If I make this a smaller project, I'll also have time to experiment and edit as I go... making this more the process I was hoping for.

A minute of animation is drawn out in scattered scenes. Scanning and editing is proving to be the most time consuming part of this process, which is why I want to get my lines right before I go through and take the time to scan all 500 ish frames. :c

Wednesday, January 25, 2012

Elyse Shapiro Studio Update for Jan 16-22

Studio Progress Update for Week of January 16th to January 22nd


Finished "Row of Occupancy" color for inner layer of lighting fixture 1. Design is intended to be placed behind and shine through original layer. When combined, the imagery looks as follows:
Up close of two layers "Row of Occupancy" and "Row of Abandonment" combined. The "Row of Occupancy" is intended to display the once- glamorous buildings in their holistic and ideal state. For example in the picture below, the building that is a victim of arson in the original design is back to its original infrastructure.
Below is an example of the "Row of Occupancy" without the "Row of Abandonment" on top of it. This shows the attention to detail I executed while creating the design on illustrator.

In-studio hours, week 3:

Monday- Printing test print for outer layer 1 of lamp. Printed first with dye, washed out, and then reprinted with textile paint. Need to continue running tests to find the most aesthetically pleasing design (4 hours)

Tuesday- Work on inner layer design for lighting fixture 1. Entitled "Row of Occupancy" is colored illustrator file to lay beneath the "Row of Abandonment" design printed fabric (6 hours)

Wednesday- Continue to work on "Row of Occupancy" (3 hours)

Thursday- Continue to work on "Row of Occupancy" and research lazy susan modem, in addition, met with Professor Rodemer to ask for tips (he has worked with kinetic art on countless occasions) (5 hours)

Friday- Finish "Row of Occupancy" design (3 hours)

Total: 21 hours

Tuesday, January 24, 2012

Sunday 22nd

Tuesdey-7 hours
Wednesdey- 6 hours
Thursday- 6
Fridey- 2 hours
Saturdey- 3 hours

finished up 4 pages the ones with the white background I will add a black one digitally This week I also worked with Indesign.

Monday, January 23, 2012

Update

This week I have been editing "Eggshells" and working on production needs for "Concertina".
All of the minor cast for Concertina has been officially cast, the editing for "eggshells has been largely smoothing out finer details that really need to be addressed and are quite time consuming as a whole (glare from fabric folds, unusual lighting, etc).

Purchases for "Concertina":
fabric for the skirt (faux batik)


base shoes to modify (will be detailed with the skirt fabric)


accessory for headband


Hours:
Monday 4 hours editing
Tuesday 2 hours shopping
1 hour casting
Wednesday 2 hours editing
Friday 3 hours editing
Sunday 4 hours editing


Studio Progress/ hours


Finished first drawing of Large scale series. Will start the next drawing tomorrow. The next one will either be more intense or a calmer part of the storm (haven't decided yet).

Hours:
Mon-2
Tues-6
Wed-3
Thu-5
Fri-1

Progress

I finished my model and tried a different technique for attaching the fan. For the final pyramid design I used Velcro to attach the fan. For this new model I used more detailed sewing and taping. Unfortunately this new technique didnt work as effectively as the velco for the pyramid. My model didnt inflate properly and Im hoping this week, when I go back and attach the velcro to model that it will inflate like I was hoping. Otherwise, I will have to re-think my second design.


images of model:


I also had to figure out how much fabric I needed from the online fabric store


math:


I was FINALLY able to reach Jean from the online fabric store who has previously given me a discount for fabric. I purchased ten yards of this nylon rip stop. I plan to screen print onto this fabric using textile paints and a design that I created in adobe illustrator.


Next week:

-fix model with velcro

-come up with illustrator print for photo screen

-hopefully receive nylon rip stop

-text fabric paint on nylon

-alter design if needed


Logged Hours:

Tuesday January 17th: figure out math for how much fabric I will need. Try calling online fabric store. Contemplate various ideas for screen print designs (8:30-11:30 am & 2:30-5 pm) 5.5 hours


Wednesday January 18th: Try calling online fabric store again to reach Jean, continue to construct model (10 am -1:30 pm) 3.5 hours


Thursday January 19th: Try calling online fabric store again to reach Jean, continue to construct model, contemplate "confetti" idea and possibly laser cutting snowflake shapes, joanne fabrics for model materials (8:30-11:30 am & 3-6 pm) 6 hours


Friday January 20th: Successfully contact jean from online fabric store to purchase nylon material and finish creating model (11am- 2:30 pm) 3.5 hours


TOTAL: 18.5 hours

Studio Update: 1/22

Sorry for the day late post but here it is! So over this past week I finished up the last block for my first print. I proofed it yesterday with both good and bad results (I will post images of it later). I found that the block appeared to do what I wanted but it was hard to tell because the color I tested on it looked terrible. I was able to test a new color for the text (purple) that turned out really nice. On the agenda for the next proof is keeping the black-brown and the purple, saturating the light-blue, and making the forth block redder and less transparent. Here is an image of the fourth block so you can see how it plays in with the rest of them.


On the agenda for this week is to get the first block for the pigeon print started today or tomorrow and finished by the latest on Saturday/Sunday.

Update for 1/22


This past week I have been working on some test molds and continuing to work on Rhino.
Monday: Rhino- 3hrs
Tuesday: all day working with Mike to finalize my Rhino file (8 hrs)
Wednesday: Mold making try 1 (4hrs)- use of plaster of paris
Thursday: Rhino+Design Research (8hrs)
Friday: CNC routing (4hrs)

^date


This week a did a lot of preparing for a trial installation.

Tuesday: 2.5 hours - worked on sketches, organizing materials

Wednesday: 4 hrs - Around noon, I visited the off-site location and took photographs and met with the exhibitions manager. That night my group worked on our Off-Site grant proposal.

Thursday: 7 hrs studio&class day - Playing with my image. I did a lot of sketching to get me back in drawing shape. Figuring out what what materials I need to buy from Fingerle.

Friday: 3 hrs - buying wood at Fingerle and foam board at Michaels. Put up furring strips.

Sunday: 5 hours. Cut foam into segments. Transferred small drawings from model onto larger foam segments. Started installing, still need to finish.


Here are some images of my process in setting up the charcoal installation:

I used a grid made of triangles to transfer the proportions of the smaller image to the life-size segments. I eye-balled it but it worked out pretty nicely. I used vine charcoal.


Here are some of the individual segments.


My attempt of installing the image. I still need to hang 7 more. I'm going to try to get a tall human to help me.